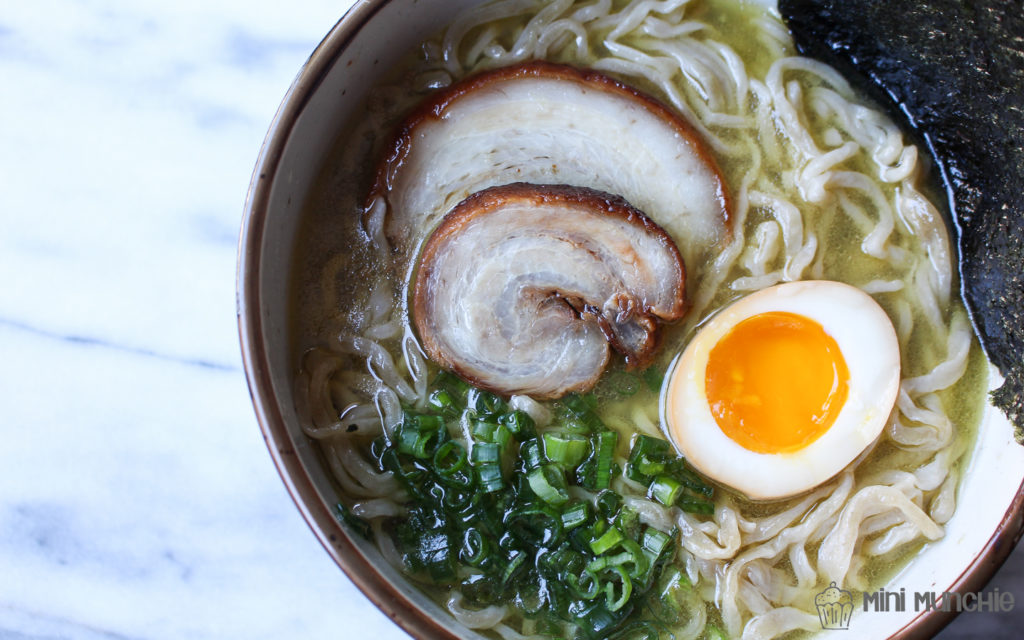
Happy New Year everyone! I haven’t posted in a while so I want to kick-off 2017 with one of my favorite comfort foods, also something on my cooking bucket list: homemade bone broth and fresh ramen noodles. So happy to finally cross this one off the list! I am hoping to post more savory recipes in 2017 so stay tuned!
Several years ago before the ramen craze hit Boston, I often traveled to NYC for ramen (and also to see my friends, of course:)). I would arrive in Manhattan right before my favorite ramen shop closes to avoid the dinner rush (normal wait times were 1-2 hours, insane right?). Right before I moved from Boston to San Francisco, new ramen shops started opening in Boston, including the famous Totto Ramen from NYC. When I first heard about chicken bone broth ramen I was highly skeptical. I didn’t think it would be possible for tori paitan (chicken white broth) to be more flavorful than tonkotsu (pork bone broth) which was my favorite at the time. Totto Ramen Boston was where I had my first bowl of tori paitan and I really wasn’t impressed but I didn’t give up on paitan right away because many friends said Totto NYC is much better.
When I moved to San Francisco I wasn’t impressed by the ramen scene but I heard that Mensho Tokyo ramen, a famous tori paitan ramen from Japan, was opening in SF soon. Soon meant… a full year later haha. After waiting a full year and a full hour in line, I finally tasted the infamous tori paitan ramen and I must say I was very impressed. The broth was very thick, rich, and creamy. I don’t normally drink much of my ramen broth so I prefer a richer, thicker broth. I went back to Mensho Tokyo a few more times and I am not sure whether my tolerance for richer broth went up or the broth there was adjusted to be lighter. Either way I got tired of waiting in line or eating at 5 or 11pm to avoid the line so I thought why not trying cooking this myself?
Making ramen broth, chashu, and noodles from scratch at home has been on my bucket list for years and I am pleased to report that this was a great success. The bowl of ramen exceeded my expectations (…and I have quite high expectations after eating tons of ramen in Japan)! Though I must warn you that this entire recipe (broth, toppings, noodles) takes time and patience… and may be a two-day process but it’s extremely worth it. If you’re still interested, keep reading! I promise that I have documented all important steps with pictures to help you along the way. If this recipe intimidates you, start by making the broth first and buy the ramen and chashu from a Japanese market for the first iteration. Then slowly make each piece of this recipe at home!
Homemade ramen took way longer than pistachio macarons, which was the most difficult dessert I’ve made so far, haha. I was lucky to have my boyfriend support me through the whole process, from finding all the right ingredients to cooking each and every part of this recipe, and of course tasting it for approval!
This recipe yields 4-5 bowls of ramen. I highly recommend following the 7 steps below and breaking the process into 3 days, or 2 at the very minimum since resting time is needed between steps. As I said earlier, I took a lot of pictures to guide you through the cooking process. The pictures are embedded as links within the directions below. If you are unsure of how to proceed with a step, click on the links and the picture should help guide you!
Day 1: gather equipment and ingredients
Day 2: complete steps 1-3a
Day 3: complete steps 3b-7 and EAT!).
If you really insist on completing the entire process in just two days, try to purchase ingredients early in the morning of day 1 and begin making the broth (about 8-10 hours of cooking) as early as possible so it can be completed at a reasonable hour…unless you are ready to pull an all-nighter for ramen! The first time we made this broth we stayed up until 4:00 a.m., totally serious…but worth it.

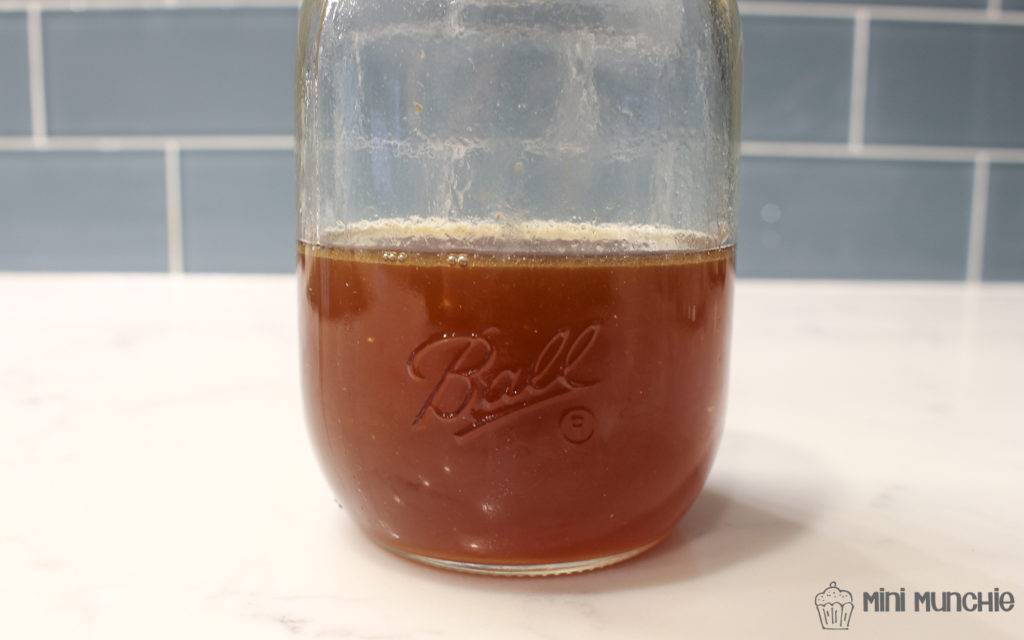
Since the first round was so delicious we made more and stored leftover broth in individual mason jars. You can refrigerate the broth in an airtight container for up to 5 days or freeze for 1-2 months. Ramen noodles also refrigerate and freeze well so it’s actually super convenient. Besides ramen noodles taking a bit longer the rest cooking should be about the same amount of time for a double recipe. You will need a 16-quart stock pot or use two 8-quart pots to prepare the bone broth.
Below is a list of things that you will need. Some of these are optional but can definitely speed up the cooking process.
Equipment Needed:
large stock pot (8-quart)
medium frying pan (cask iron pan recommended)
medium pot
pasta maker or Kitchen Aid mixer with pasta maker attachment (for homemade ramen)
liquid measuring cup
kitchen scale
measuring spoons
serving bowls
ladle
plastic wrap, large ziplock bags (optional)
cooking thermometer (optional)
blow torch (optional)
This recipe was adapted and inspired by a combination of recipes online after many hours of research. All the original sources are at the end of this post.
Step 1: Tori Paitan (Chicken White Broth)
Estimated Time: 10 hours (6-8 hours boiling time)
Yield: 4-5 servings
Tori paitan stands for chicken white broth. The white broth is achieved after many hours of rapid boiling to the point where chicken bones have broken down almost completely. You can typically find most of the chicken ingredients for this broth at an asian supermarket. I bought all ingredients for this broth at 99 Ranch Market in California. You can also use bones from rotisserie chickens (2lbs worth of bones) after consuming the meat. If you bought whole chickens you want to remove the meat because it can make your broth look cloudy instead of the beautiful paitan (white broth). If you find it difficult to remove raw meat from a whole chicken, section the chicken before boiling and debone the meat after the chicken cooks through (about 20 minutes of boiling). Chicken backs, wings, and feet are great for this broth. Some of you may not be comfortable using chicken feet but they are a great source of collagen for your broth! Finally you don’t want to add aromatics until the very end. Since the broth cooks in a rapid boil for several hours, adding aromatics too early may cause it to burn. You don’t need to cook the vegetables for that long anyway.

(Top to Bottom: Chicken carcass/bones, chicken wings, and chicken feet)
2 lb chicken bones or 1 whole chicken broken down into sections with the meat removed
1-2 lb chicken wings or mids
1-2 lb chicken feet, toes removed
1/2 carrot, sliced
1/2 onion, sliced
white ends from 5-6 green onions (roots removed)
1-2 inch ginger, sliced (if you like less ginger, just use 1 inch)
10 cloves of garlic, peeled
- Break down chicken parts into sections and remove toes from chicken feet. Soak chicken parts in cold water for two hours right before cooking (this will help remove some of the scum that will appear after boiling)
- Drain the water, place all chicken parts into a stock pot (at least 8 quart), and fill the pot with cold water covering about 2 inches over the chicken
- Place the pot over high heat and bring to boil with the pot covered
- Skim the scum that floats to the surface until no scum arises. Around 15-20 minutes of high heat boiling
- Cover the pot, cook on medium heat, ensuring that the pot is constantly boiling rapidly for 6-8 hours or until the bones have broken down and the broth has changed to a white creamy color. Refill with cold water (always covering about 2 inches over chicken) and stir occasionally to avoid burning in the bottom (Note: Do not simmer! The bones must break down with rapid boiling)
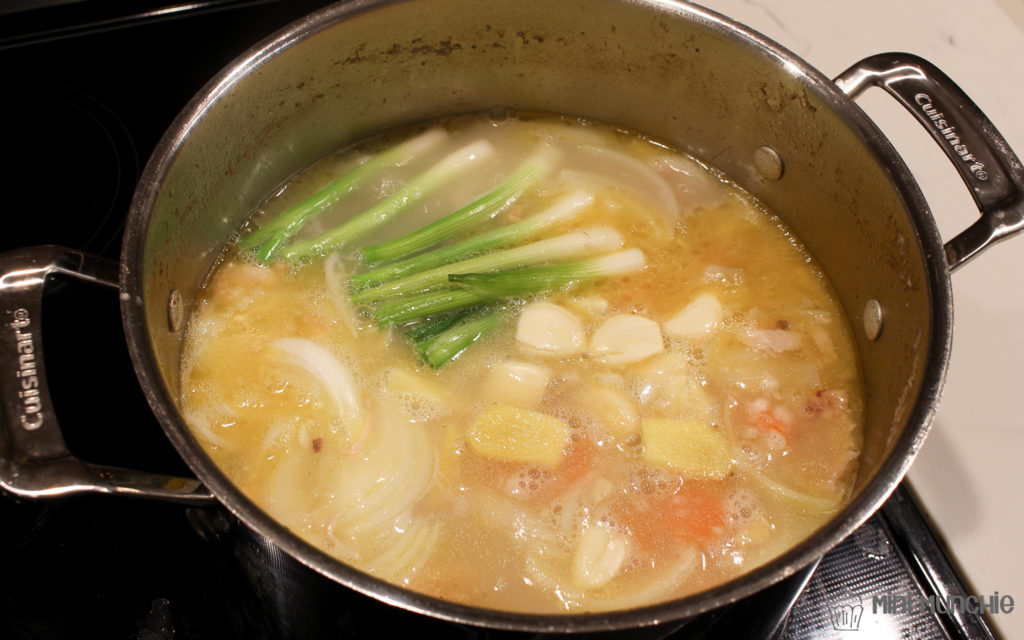
- Once the broth has reached a white creamy color and the chicken bones have broken down (at least 6 hours of rapid boiling; your broth should have reduce a little over half the pot), add aromatics (carrot, onion, green onions, ginger, and garlic) to the pot. Boil uncovered on medium for about an hour. The broth should have reduced and thickened when finished
- Strain the broth, discard all chicken bones, meats, and vegetables (they won’t have much flavor at this point to keep). Let the broth cool before storing in the refrigerator if you don’t plan on serving right away
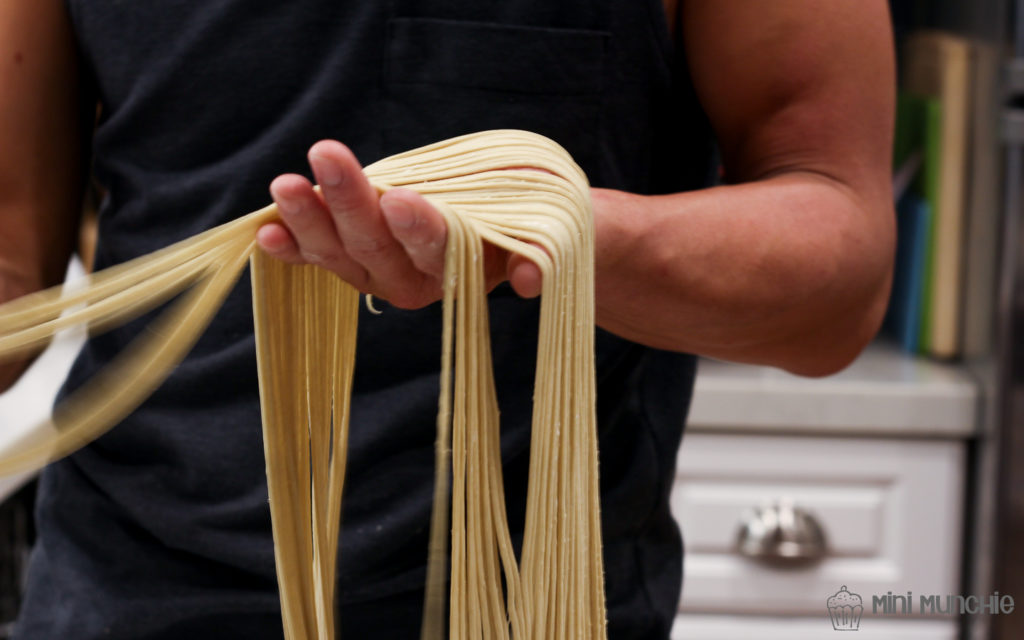
Step 2: Ramen Noodles
Estimated Time: 2 hours + 13 hours resting time
Yield: 5 servings
We really enjoyed fresh ramen noodles and it turned out to be easier to make than we thought. The one ingredient we didn’t use was riboflavin (vitamin b2) which lightens the color of the noodles. You’ll notice that many ramen noodles sold at supermarkets have this ingredient in it. It’s for aesthetics only. I hate to break it to you but without a pasta maker or a Kitchen Aid pasta cutter attachment it will be pretty difficult to make your own ramen. I would skip this step and opt for Sun Noodles or other ramen noodles sold at Japanese supermarkets, usually in the refrigerated section. Bread flour and vital wheat gluten can be found at Whole Foods if you decide to make your own. Kansui comes in bottle form and can be found at asian supermarkets. Kansui provides the alkaline component needed to increase pH in the noodle dough, making the noodle stronger and more chewy.
3 c bread flour
1/4 c vital wheat gluten
1 tsp salt
1+1/2 tsp kansui (lye water or alkaline solution)
1 c water (room temperature to cold)
1 egg
1/4 c all purpose flour (for dusting)
- Combine bread flour, gluten, salt in the bowl of an electric stand mixer
- Combine kansui and water and set aside
- In the bowl of the electric mixer, add an egg then mix with the dough hook attachment (Kitchen Aid mixer attachment)
- Slowly add water mixture (kansui + water) and continue mixing until you have a ball of dough. Make sure you add the water mixture in a consistent speed, not too slowly or too quickly or else you may end up with very stiff or very sticky dough.
- The dough should be quite stiff when the mixing is done. Flatten the dough and place it in a bag or plastic wrap (not fully closed), and let it rest for 1 hour at room temperature
- Divide the dough into quarters and roll each quarter through the widest setting of the pasta roller attachment. Repeat this several times, folding it before running through the pasta roller and adjusting the width setting of roller each time, until the dough has flattened to as wide as the pasta roller attachment (about 10-15 times per quarter dough)
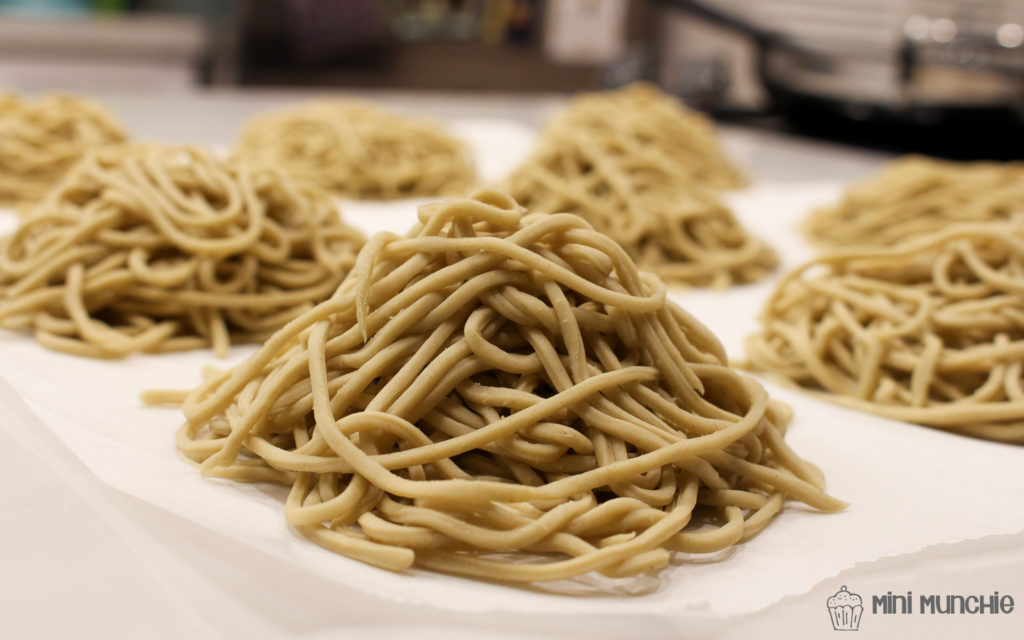
- Dust the flattened dough with a little bit of flour then run the dough through the pasta cutter attachment. Dust fresh cut noodles with a little bit of flour to prevent them from sticking together
- Divide ramen into 75g each and refrigerate ramen in zip lock bags or an airtight container. Recommend resting the noodles in the refrigerator for a day before serving
- Store in the refrigerator for up to 3 days or freeze for up to 1 month
Fresh noodles: 1-2 minutes in boiling water
Refrigerated noodles: 4-5 minutes in boiling water (leave noodles at room temperature for 30 minutes prior to cooking)
Frozen noodles: 6-8 minutes in boiling water. (Recommend defrosting in the refrigerator overnight and leaving noodles in room temperature for 30 minutes prior to cooking for 4 minutes)
Step 3: Tare (Soy Basting Sauce)
Estimated Time: 1 hour + 8 hrs+/overnight resting time
Yield: 10 servings
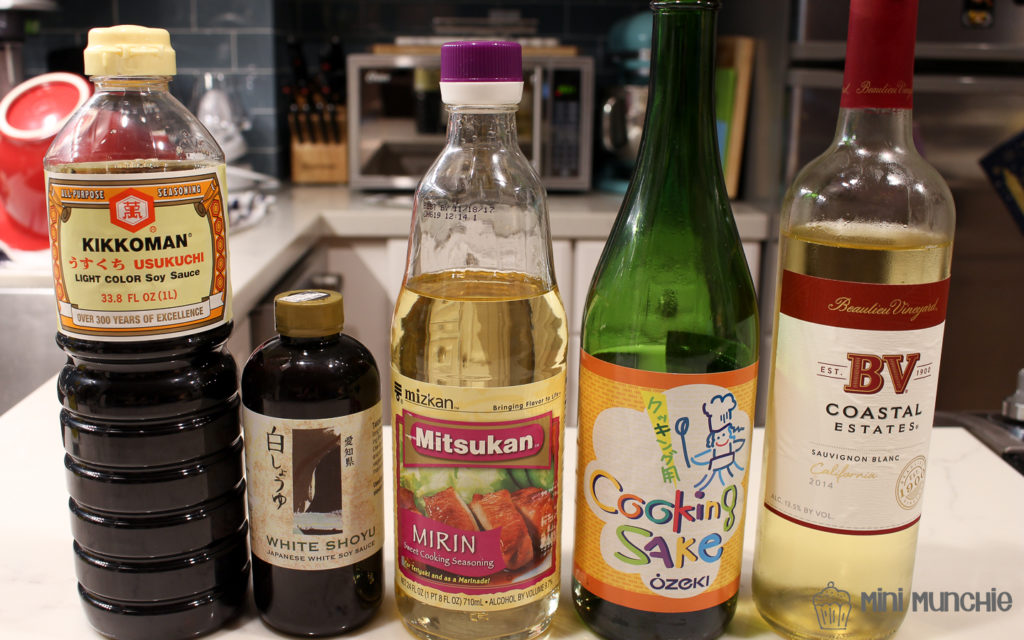
(Left to Right: Usukuchi Soy Sauce, White Shoyu, Mirin, Cooking Sake, and Dry White Wine)
Since we don’t add any salt or seasoning in the bone broth, tare is a great flavor enhancer. The ingredients for tare can be found at Japanese supermarkets (some ingredients can be found at Chinese supermarkets). The first ingredient, kombu, is dried edible kelp, which usually comes in a few sheets near the seaweed section of the market. Kombu is typically used to make dashi broth which you have probably had at a shabu shabu (Japanese hotpot) restaurant. The picture above should help you locate some of the other sauces for tare. If you can’t find white shoyu it can be substituted with usukuchi (light colored soy sauce). White shoyu is for aesthetic purposes only as it helps keep the color of the broth lighter. If you use regular soy sauce instead of white shoyu or usukuchi, your broth will turn out much darker. Any dry white wine would work too, I just found a cheap bottle of sauvignon blanc which has the high acidity needed for tare. Refrigerate leftover tare in an airtight container up to a month. You can also freeze it for another batch of ramen.
8g kombu (dried edible kelp)
1/4c mirin
1/4c sake
1+1/2 Tbsp dry white wine
5+1/2 Tbsp white shoyu (white soy sauce)
1+1/2 Tbsp usukuchi soy sauce (light colored soy sauce)
1+1/2tsp salt
2 tsp MSG (optional)
1/2c niboshi (dried sardines/anchovies), heads and guts removed (25g after heads removed)
2 tsp sesame oil
2/3c water
1/2c katsuobushi (dried bonito flakes)
Step 3a: Prep for tare
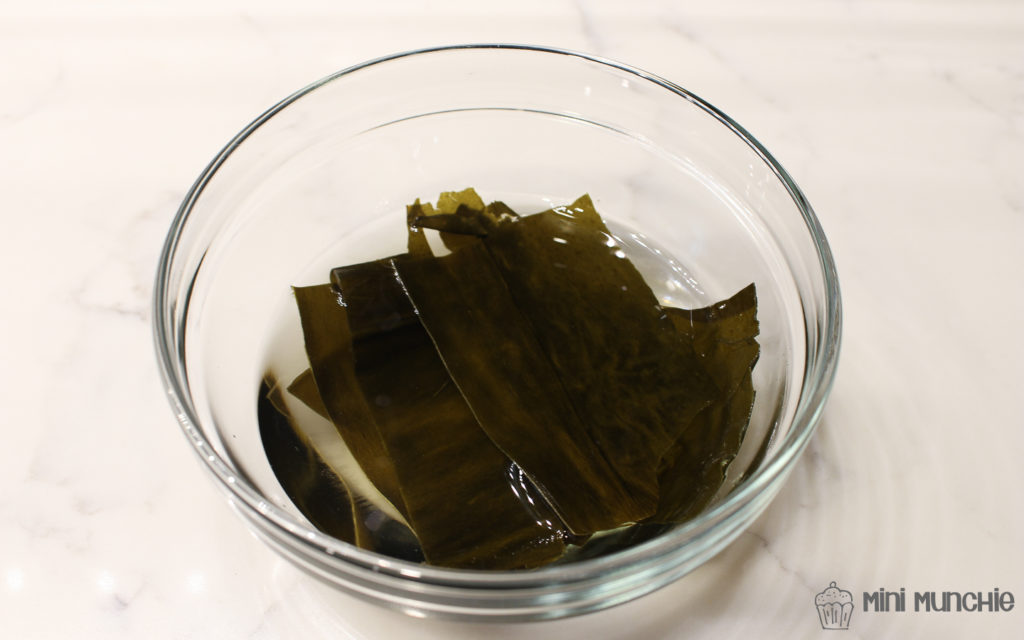
- In a medium bowl, soak kombu in mirin, sake, and dry white wine in the refrigerator overnight (at least 8 hours)
Step 3b: Making the sauce
- After soaking, pour kombu and liquid into a small pot and raise the heat to medium/high and bring to almost a boil (when you see small bubbles) and hold the slight boil for 5 minutes
- Remove the kombu and keep it at a small boil for about 5 minutes to reduce the alcohol
- Add soy sauces (white shoyu and usukuchi), salts, and MSG (optional) to the mixture until combined. Remove from heat and set aside
- In a separate pot, add sesame oil and niboshi and cook in medium high heat for a minute, stirring occasionally
- Add water to the pot and bring to a slight boil. Add the katsuobushi and keep at the slight boil for 10 minutes
- Strain the liquid and combine with the soy sauce mixture from step 3. Mix well and set aside.
Note: You should end up with a little over a cup of tare which is enough for about 10 bowls of ramen. It’s difficult to make any less than this amount but you can refrigerate tare in an airtight container for about a a month or freeze it for longer.
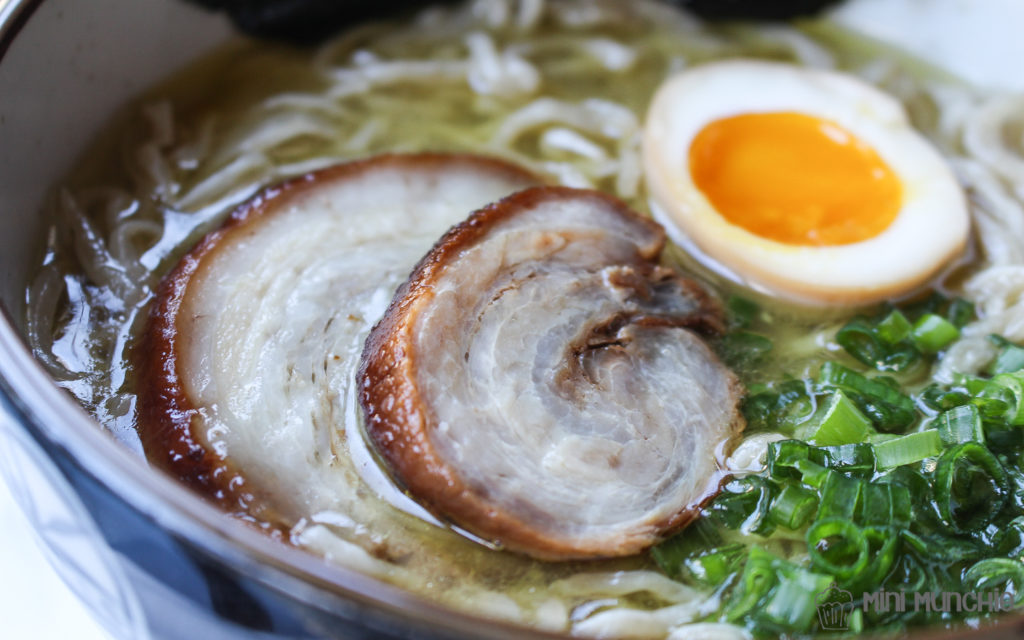
Step 4: Chashu (stewed pork)
Estimated Time: 3-4 hours
Yield: 5 servings
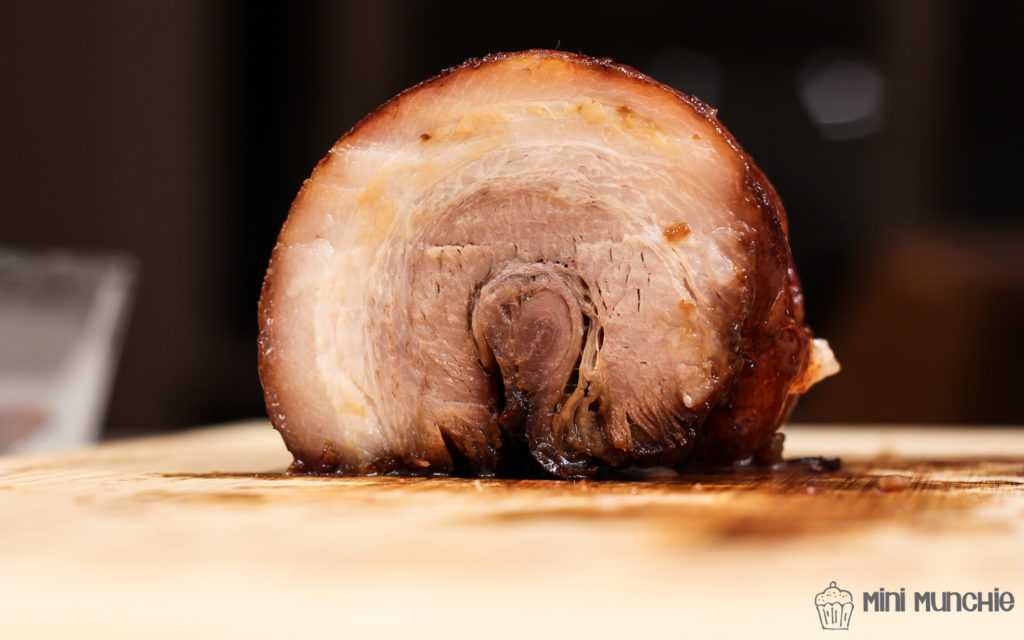
For Chashu, I recommend rolling up a thick block of pork belly in a “U” shape and securing with a kitchen twine for cooking. Thicker cuts are easier to slice after cooking. Sometimes Chinese supermarkets sell pork belly in thinner long rectangular pieces instead of thick square blocks. I prefer to buy pork belly from Whole Foods as I typically find higher quality meat there. If you have a blow torch you can sear the fatty parts of the belly right before serving.
1-1.5lb pork belly
1 tsp salt
1/2 Tbsp vegetable oil
1 green onion
1+1/3c water
2/3c sake
2/3c soy sauce
3 Tbsp mirin
6 Tbsp sugar
2 inch ginger, peeled and sliced
- Separate the green and white part of the green onion. Cut green onion into 2 inch lengths. For the white part, cut open and remove the soft green core. Set the green part and soft green core aside
- For the white part, slice into thin strips and soak in cold water for 10 minutes to make shiraga negi. Drain the water and store in an airtight container
- Rub salt on the pork belly
- Heat oil in the pan over high heat and brown the fat side of the pork belly, then flip over to brown the other side. This should take about 10 minutes
- In a bowl, add water, sake, soy sauce, mirin, and sugar. Stir until combined
- Place the pork belly in the medium pot then add sauces (from step 5), ginger, and green onion (green part and soft green core from step 1) and bring the pot to boil
- After the pot comes to boil, reduce to a medium low heat and place a drop lid (otoshibuta) on top of the meat. If you don’t have one, make one out of aluminum foil. Do not use a regular lid
- Simmer on medium low heat for about 2 – 3 hours, occasionally turning (cooking time will depend on the amount of fat content in your pork belly, keep an eye on the sauce to make sure it doesn’t reduce completely and burn the pork belly)
- Remove the drop lid and reduce the sauce for another 30 minutes or so until the sauce thick and the meat glossy
- Remove the meat from the pot and cut into thin slices and set aside to top the ramen when ready. If you have a blow torch handy, sear the pork belly for a few seconds right before serving.
- If not using right away, store chashu in an air-tight container in the refrigerator up to 5 days or a month in the freezer. When ready to use, cut a few thin slices and heat in up in a pan or microwave (30 seconds only for refrigerated chashu).
Step 5: Aroma Oil
Estimated Time: 30 minutes
Yield: 10 servings

Aroma oil is best made with chicken fat (duck fat works too), onion, ginger, and garlic. Your local butcher may sell chicken/duck fat just call ahead and ask. If you can’t find chicken fat you can make aroma oil using the Alternative Recipe below using vegetable oil and concentrated chicken stock. We have taste tested the alternative recipe and it tasted pretty good!
1c chicken fat
1/4c onion
2 inch ginger, sliced
10 garlic cloves, minced
- In a small pot over medium heat, add chicken fat with onions, ginger, and garlic. Cook until it starts to brown, around 15 minutes
- Strain oil and set aside
Alternative Recipe:
1 chicken bouillon cube
1c water
1c vegetable oil
1/4c onion
2 inch ginger
10 garlic cloves, sliced
- Melt chicken bouillon cube in boiling water to make concentrated chicken stock
- Heat vegetable in a small pot and add chicken stock, onion, ginger, and garlic
- Cook over medium heat for about 20 minutes or until sauce thickens and begin to brown
- Strain oil and set aside
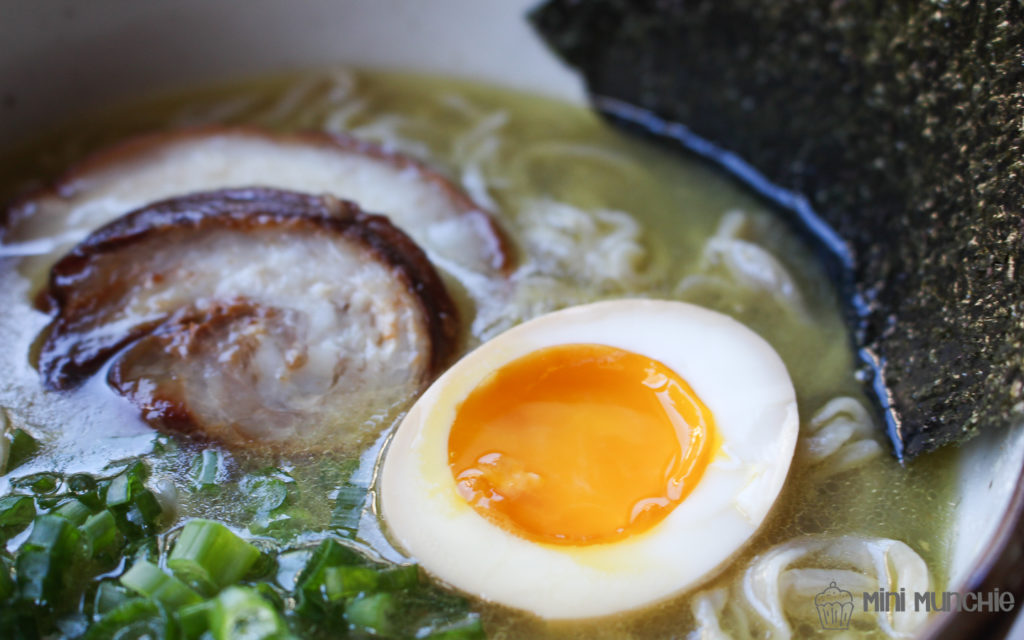
Step 6: Soft Boiled Egg
Estimated Time: 25-30 minutes
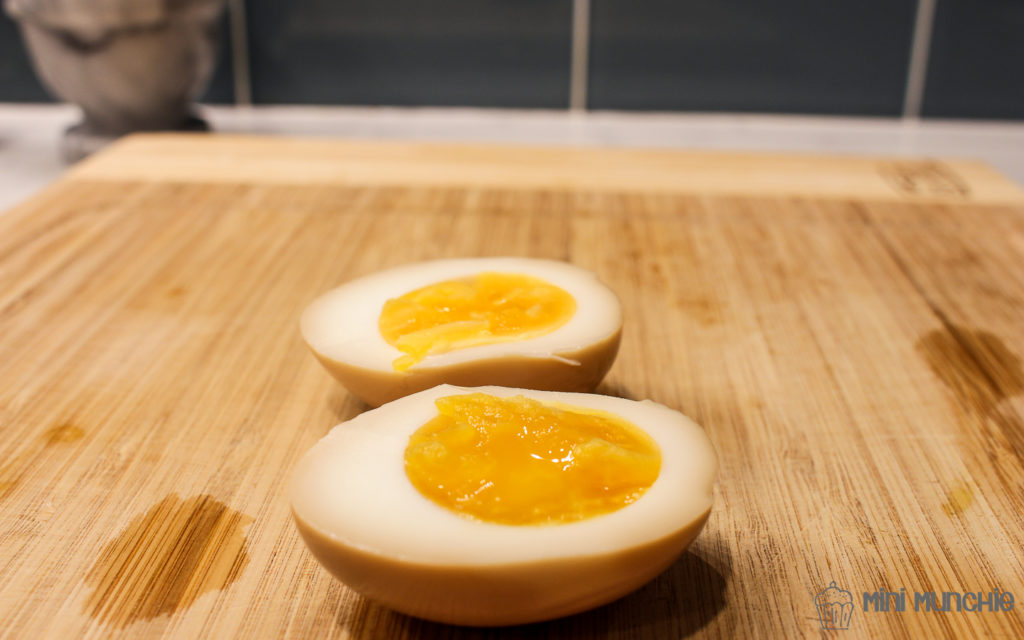
The old fashion way of boiling eggs in a pot has worked pretty well for me. Alternatively you can sous vide the eggs exactly to your liking but it does take a bit longer. This egg calculator can help you determine how long to cook your egg for in a sous vide. You can also season your egg to achieve the light brown color often seen in a bowl of ramen noodles. You can season the egg by refrigerating the cooked eggs in a zip log bag/air tight container with some 2 Tbsp soy sauce, 2 Tbsp mirin, and 6 Tbsp water for 2 days.
large eggs
water
ice
- Bring a pot of water to boil
- Add eggs gently using a ladle so it doesn’t break and boil for 6 minutes and 30 seconds (runny egg yolk) and 8 minutes and 30 seconds (custard like, not runny egg yolk)
- Prepare an ice bath while the eggs are cooking
- Remove eggs from hot water and transfer to an ice bath to cool for about 15 minutes
- Peel shells off the egg and use immediately or store it in an airtight container in the refrigerator for up to 2 days.
Step 7: Assembling Ramen
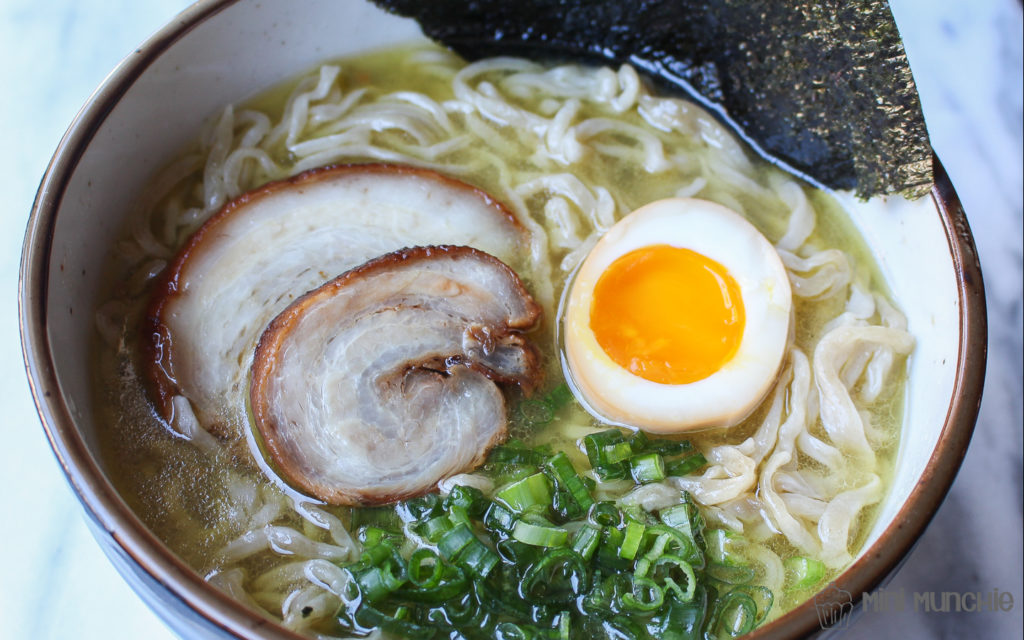
I highly recommend heating your serving bowls. This will prevent the bowl from cooling down the soup too quickly. This recipe creates a pretty rich and thick broth so if you find the broth too rich, add just a little bit of hot water to thin the soup to your liking.
2 Tbsp tare
1 Tbsp aroma oil
1 + 1/4c of broth (300 ml)
150g ramen (2x 75g dough previously divided in the ramen recipe above)
2-4 slices chashu
few strips of shiraga negi (see chashu recipe step 2)
egg
other optional toppings: nori, corn, wood ear mushrooms, bamboo shoots, etc.
- Preheat the serving bowls by putting them in hot water or adding hot water in the bowl (dumping the water right before using)
- Heat the broth to the point just under boiling (trust me, it taste better this way just make sure the bowl is hot when you pour the soup in, about 160F if you have a thermometer)
- Cook the noodles in boiling water (follow suggested times in the ramen recipe above)
- Prep the ramen broth while noodles are cooking. In the preheated bowl, add tare, aroma oil, and heated broth (in this particular order – you want the aroma oil sitting on top of the tare)
- Strain noodles and add it to your ramen broth
- Top with chashu, shiraga negi, egg, nori, and other toppings of your liking
- Eat right away. There is no time for pictures (ha!) If the ramen is on the lighter side, add a pinch of salt or another half a tablespoon of tare.
Congratulations! You’ve done it. Now I’d love to hear how your bowl of homemade ramen tasted. Please share your comments below!
Inspired and adapted from:
Are you going to try making the tonkotsu broth ramen as well?
Yes, I plan to try making that broth next so stay tuned!
I just finished making this one, one full day of prep not including the noodles (bought them). very good flavor and texture, thank you for sharing.